T
Loading…
Loading…
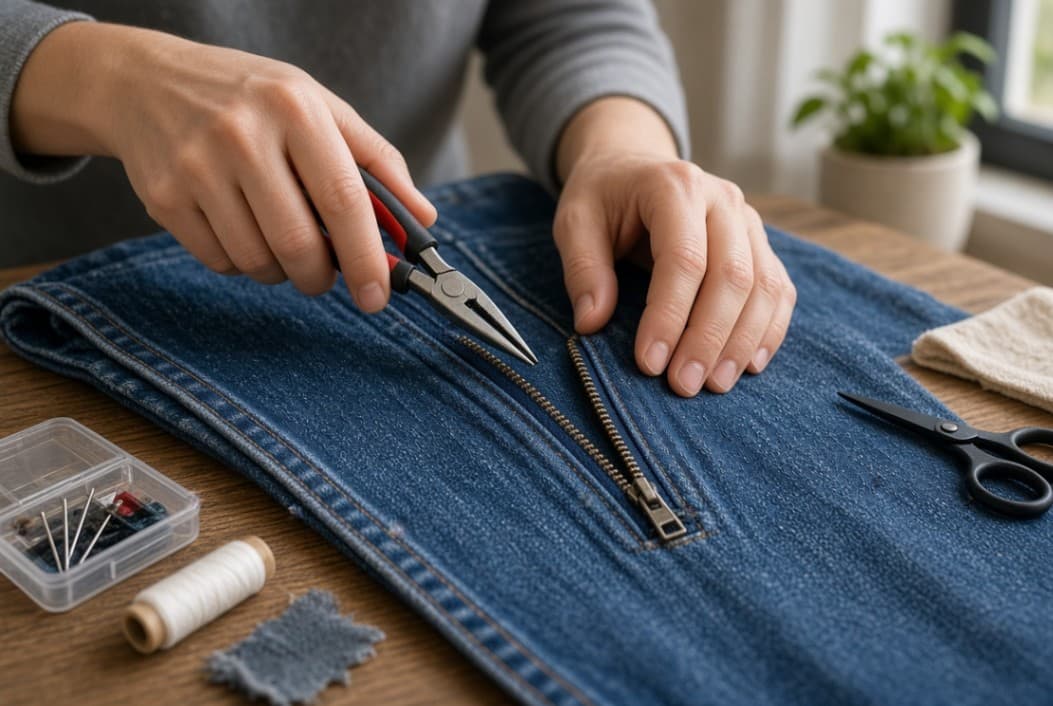
A loose button or faulty zip does not automatically make a shirt, skirt, pair of trousers, bag, or dress unusable. With a needle, thread, pliers, soap, and a few minutes, many small clothing repairs can be completed at home.
This guide explains how to fix a zipper at home, sew a loose button securely, repair common fastening problems, and identify damage that needs a professional tailor. These skills are useful for everyday clothes, thrifted fashion, school uniforms, workwear, handbags, shoes, and secondhand items.
Keep the following items in a small repair kit:
| Tool | Common use |
|---|---|
| Needle | Sewing buttons and reinforcing fabric |
| Strong thread | Attaching buttons and creating temporary zipper stops |
| Small scissors | Cutting thread and removing damaged stitches |
| Needle-nose pliers | Adjusting zipper sliders and removing stops |
| Tweezers | Removing trapped fabric or thread |
| Bar soap or graphite pencil | Helping a stiff zipper slide |
| Spare buttons | Replacing missing or cracked buttons |
| Replacement zipper slider | Repairing a worn or distorted slider |
| Thimble | Protecting fingers when sewing thick fabric |
A small sewing kit can reduce the need to discard a garment because of one missing button or minor fastening problem. Repair guidance from clothing and outdoor-wear organisations also focuses on extending garment life rather than replacing an otherwise usable item.
Before starting, place the garment on a flat, well-lit surface. Keep sharp tools away from children and work slowly around metal zipper teeth.
A button often becomes loose because the thread has stretched, the fabric has weakened, or the button is pulled repeatedly against a tight buttonhole. Sewing over a weak attachment without checking the fabric can create another failure.
Inspect the button for cracks, sharp edges, or missing holes. Check the fabric beneath it for thinning, tearing, or a larger hole caused by the old thread.
Have something to give away or sell?
Post your first listing — it only takes a couple of minutes.
If the button is damaged, replace it with one of a similar size and colour. For shirts, align the replacement with the other buttons so the garment closes evenly.
If the button is hanging by one or two threads, cut away the loose thread carefully. If the existing button is still positioned correctly and the thread is only slightly loose, sewing over it several times can also reinforce it.
Thread a needle with approximately 45–60 centimetres of strong thread. Double the thread for ordinary shirts and dresses, but use a single strong thread for very delicate fabric.
Place the button over the original attachment point. For a missing button, close the garment and mark the location where the buttonhole meets the fabric.
The button should not be pulled tightly against the material. A small thread gap, called a shank, gives thicker fabric enough room to pass through the buttonhole.
A practical button-sewing sequence uses repeated passes through the holes, followed by wrapping thread beneath the button to create a secure shank.
Bring the needle out beneath the button and wrap the thread around the stitches several times. Push the needle to the underside, make two small locking stitches, tie a firm knot, and trim the excess thread.
For a coat, denim item, school uniform, or heavy bag strap, use stronger thread and make additional passes. If the surrounding fabric is torn, place a small backing patch on the inside before sewing the button.
The correct repair depends on the symptom. A zipper that is stuck requires a different approach from one that separates after closing.
| Zipper problem | Likely cause | First repair to try |
|---|---|---|
| Zipper is stuck | Fabric, thread, dirt, or dry teeth | Remove obstruction and lubricate lightly |
| Zipper closes but opens behind the slider | Loose or worn slider | Gently tighten the slider with pliers |
| Slider has come off | Damaged or removed zipper stop | Refit the slider and create a new stop |
| One side separates at the bottom | Misaligned insertion or damaged starter pin | Reinsert carefully or replace the part |
| Teeth are bent or missing | Physical damage | Realign minor bends; replace zipper for major damage |
| Pull tab is missing | Broken puller | Attach a temporary cord or replacement pull |
Start by checking whether fabric, loose thread, or hair is caught inside the slider. Do not force the pull because excessive pressure can bend the teeth or tear the fabric.
Graphite and soap are commonly suggested for stiff zippers because they reduce friction without requiring aggressive pulling.
Avoid applying oily products directly to light-coloured clothing, silk, or fabric that stains easily. If a product is used, test it first on an unseen area.
A zipper that closes and then opens behind the slider often has a slider that no longer grips both sides tightly enough.
Use small adjustments rather than crushing the slider. Repair guides warn that the slider needs to become tighter without being over-tightened, because excessive force can prevent movement altogether.
This method is more suitable when the teeth are present and aligned. If the teeth are missing or the slider is visibly cracked, tightening it may not solve the problem.
When a zipper slider has come off the end, the zipper stop may need to be removed first. The stop is the small piece that prevents the slider from leaving the zipper chain.
If the original stop is missing, create a temporary thread stop by making several strong stitches across the end of the zipper. Oxfam describes using multiple stitches as a replacement stop when a plastic stop cannot be reused.
This repair is easier on trousers, skirts, bags, and jackets with an accessible zipper end. A concealed dress zipper or a zipper sewn into a lining may require partial seam opening.
A missing pull tab does not always mean the entire zipper needs replacing. Temporary replacements include:
Choose a pull that does not have sharp edges. A temporary pull can help you use the garment while arranging a more permanent repair.
Use this checklist before and during the repair:
A zipper with several missing teeth, a torn seam, or a damaged fabric panel often needs replacement rather than repeated home adjustments. Trying to force a severely damaged zipper can enlarge the tear and increase the repair cost.
The cost of a repair depends on the garment, material, zipper length, location, and tailor. The ranges below are practical budgeting examples rather than fixed national prices.
| Repair | Typical materials | Example range in Nigerian naira |
|---|---|---|
| Re-sewing one loose button | Thread and existing button | ₦0–₦500 at home |
| Replacing several shirt buttons | Buttons and thread | ₦500–₦2,000 |
| Replacing a trouser or skirt zip | New zipper and labour | ₦1,000–₦4,000 |
| Replacing a dress zip | Longer or concealed zipper and labour | ₦2,000–₦6,000 |
| Repairing a bag zip | Stronger zipper or slider | ₦1,500–₦6,000 |
| Adjusting a loose zipper slider | Existing zipper | ₦500–₦2,000 |
Prices vary between neighbourhood tailors, markets, fashion workshops, and major Nigerian cities. In Alimosho and other busy Lagos communities, asking whether the quoted amount includes the zipper, thread, and labour helps avoid misunderstandings.
A home repair can work for a loose button, minor obstruction, missing pull, or slightly loose slider. A tailor is more appropriate when:
Before handing over the item, agree on the repair, materials, price, and expected collection time. If the garment is expensive or delicate, request that the tailor inspect it before cutting or removing the original zipper.
| Situation | Home repair suitability | What to do |
|---|---|---|
| Button is loose but fabric is intact | High | Sew it again with strong thread |
| Button is missing | High | Match size and position, then sew |
| Zipper is stuck on loose thread | High | Remove thread and lubricate lightly |
| Zipper splits but teeth are intact | Moderate | Adjust the slider gradually |
| Zipper pull is missing | High | Add a cord or replacement pull |
| Zipper stop is missing | Moderate | Refit slider and stitch a stop |
| Several teeth are missing | Low | Ask a tailor about zipper replacement |
| Fabric is torn beside the zipper | Low | Repair the fabric and zipper professionally |
Imagine buying secondhand trousers with a working zip but one loose waist button. First, check the button’s size, inspect the fabric, and mark its position against the buttonhole. Sew it with doubled thread, make a small shank, and test the closure while standing and sitting.
If the trousers have a zip that separates near the waist, inspect the teeth before tightening the slider. When all teeth are present, a slight adjustment may help. If the zip still separates or the fabric is pulling around the seam, a tailor can assess whether the slider or the entire zipper needs replacement.
Repairing a garment keeps its existing fabric, buttons, zips, labour, and design in use. It can also make secondhand clothing more practical because minor faults become manageable rather than automatic reasons for disposal.
Small repairs support circular fashion in a direct way:
When buying secondhand, inspect fastenings before completing a transaction. Check every button, open and close each zipper, examine seams, and ask about faults that are not visible in photographs.
If you are listing repaired or lightly faulty clothes, shoes, bags, hair, jewellery, or accessories, Threddo provides a free WhatsApp-first way to describe the item, disclose its condition, and connect directly with interested buyers. Add clear photographs and state whether a button or zipper has been repaired; the platform’s Safety Guide can also help with safer direct trading.
Before returning the item to your wardrobe:
Learning how to fix a zipper at home and sew a loose button can extend the useful life of clothing, bags, uniforms, and thrifted fashion. Start with the least invasive repair, use gentle pressure, disclose repairs when trading secondhand, and involve a tailor when the teeth, seams, or fabric are seriously damaged. This article is for educational purposes only and does not constitute professional advice. Always follow safe trading practices and use your own judgement.